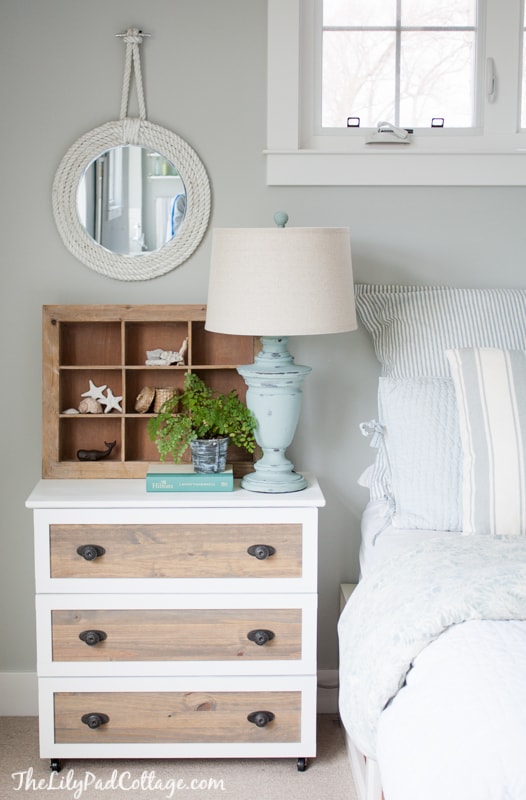
For my tarva makeover, I searched the depths of Pinterest for feasible hacks. My biggest lament about most of the tarva hacks I see is that they lack dimension, which doesn't improve the overall 'cheap' look, in my opinion. So simply painting or staining the furniture was not an option for me. At the same time, I wanted a project that was going to be at my skill level (novice).
I was inspired by these two simplistic hacks:

From Dear Lillie
From what was described, the biggest modification to these two pieces was the addition of simple molding to the drawers, followed by paint and hardware. Totally doable.
I purchased stain-grade molding from Home Depot (in the lumbar section). I made sure to measure how much I would need. For the 3 drawer dresser and the 6 drawer chest I bought 52 linear feet. That gave me a few extra feet to test the stains on, and allow for a mishap or two when making cuts.
Eric did most of the wood work. After we (he) cut the trim to frame each drawer front, we applied the strips with wood glue and held them in place with clamps (great investment at about $1 per clamp!) for 30 minutes. Once dry and secure, I gave the newly applied trim a quick once-over with 220 grit sand paper, to match the smoothness of the rest of the dresser, which I had previously sanded.
I tested numerous stains and combinations on a leftover piece of molding. I was so unimpressed by the Minwax Wood Finish stains compared to the Varathane Wood Stains. The Minwax Wood Finish stains were incredibly thin, and had to sit for at least 10 minutes to get a decent amount of color (albeit, this may very well been due to the type of wood I was using). The Varathane stains on the other hand, resulted in much richer and more even color. It was also easier to work with since it was slightly thicker.
Before and after one coat of Varathane stain
I will say though, that I am a fan of the Minwax pre-stain conditioner. After applying the conditioner, I applied Provincial by Varathane. I decided I wanted it a tad darker though, without enhancing the contrast of the grain (I highly suspected this was going to happen, as pine is a type of wood that does not achieve uniform stain coverage).
So in comes Minwax Gel Stain in Hickory. It is not really a "stain" by true definition (a lot of DIYers use it to darken their kitchen cabinets or entry doors), it is more so a translucent paint that you apply and wipe off. I was able to apply varying amounts to the lighter and darker areas, which evened out the overall contrast.
On the left: Provincial Stain with one quick coat of Hickory Gel
On the right: 2 additional coats of Hickory Gel
On the right: 2 additional coats of Hickory Gel
After achieving the color and tone I wanted, I let it dry for 2 days (until the gel stain was no longer 'tacky'), and then applied a couple of coats of satin-finish polyurethane. I'll most likely go back and add a third coat to the top since it's a frequently used surface. Note: you don't have to apply the gel stain over a wood stain, but there are limited color options for the gel, and I wanted some added warmth.
Hardware was the final step. I never thought it would be so difficult. Well, what actually made it difficult was that I wanted all the gorgeous hardware from Anthropologie, but I refused to pay $8 to $12 per knob (I needed 18+ knobs total). After testing out several different options, I inevitably fell in love with the mercury glass knobs I found on the World Market website (2 for $7.98! + shipping) Which is a total steal compared to the other prices I found online).

.png)

.png)


